Thursday 28 February 2013

Sticky & Squidgy (and low fat) Malt Loaf

I'm searching out low fat recipes, primarily to encourage a healthier eating in the household! Also, because I am addicted to baking, the need to the reduce fat content of my baking wherever possible, seems like a good idea to help prevent rising cholesterol issues!!

I have bought Soreen Malt Loaf for years, partly because it always seems so ridiculously cheap in comparison to other products; and partly because it is so darn tasty, squidgy, and moreish!

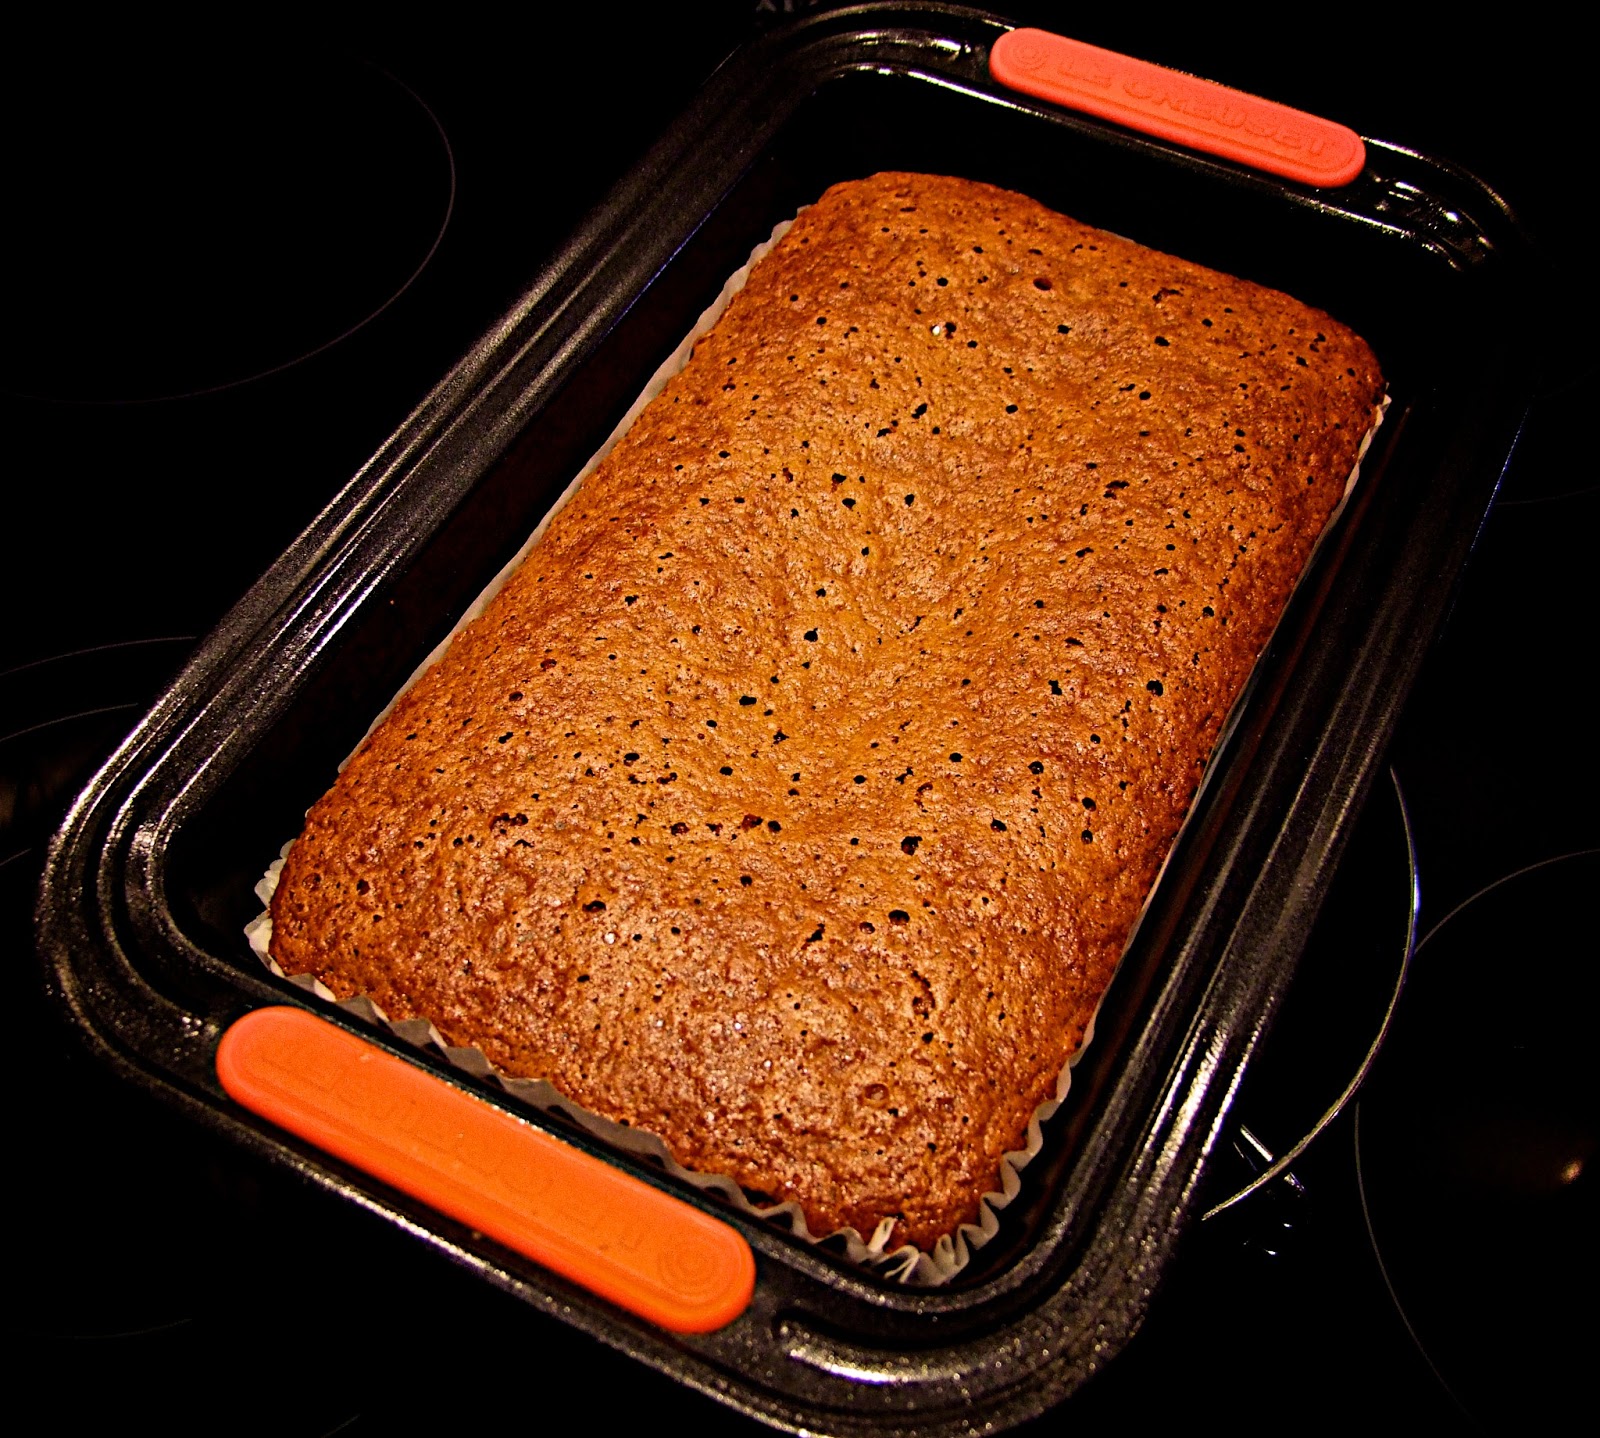
So...enter this super Sticky & Squidgy, low fat (only 1g of fat per slice) Malt Loaf.  It is very easy to make, and I would say very foolproof.  It is said to be good for up to 5 days, wrapped in cling film and stored in an airtight container...I'll let you know about that!  It is also said that the malt loaf becomes more sticky over the days after baking!

The malt extract appears to be one of those items in a recipe that is quite tricky to track down.  I bought mine from Holland & Barrett with no problems whatsoever, so it's maybe one of those items that is more prevalent in a health food store rather than a supermarket.

You will need:

  • sunflower oil to grease the tin
  • 150 ml hot black tea
  • 175 g malt extract
  • 1 teaspoon of black treacle
  • 85 g dark muscovado sugar
  • 300 g mixed dried fruits (I used 150 g of currants, and 150 g sultanas)
  • 2 medium eggs
  • 250 g plain flour
  • 1 teaspoon baking powder
  • 1.2 teaspoon bicarbonate of soda

Method:
1.  Heat the oven to 130 C fan (after soaking fruit in tea for approx 2 hours), and grease a 2 lb loaf tin with sunflower oil, and line tin with greaseproof paper
2.  Pour the hot tea over the mixed fruit, malt, sugar, and black treacle.  Stir well.  Leave to soak for approx 2 hours
3.  Beat the eggs in a jug, then add to the bowl of soaked fruit, sugar, malt extract, and black treacle.  Stir the mixture well to ensure the eggs are well combined
4.  Add the flour, stir this in well, then add the baking powder and bicarbonate of soda, then pour into the tin
5.  Bake for 1 hour and 50 mins (test middle to ensure properly baked)
6.  Leave to cool slightly in tin before removing.  Wrap in cling film when completely cool and store in an airtight container
7.  Serve slices buttered (or the healthier option of low fat spread such as Utterly Butterly!)


Enjoy!

Baked Mashed Potato

As promised in the Beef Casserole recipe, here is the recipe for the Baked Mashed Potato.  I personally dislike mashed potato to extreme levels!  It conjures up all kinds of memories from bad school dinners, where it was served up with baked beans and was usually grey-looking, and full of lumps!  Or was that just my school? :)  Then by chance I stumbled upon this recipe, and thought I'd give it a try, and I was astonished at how unlike mashed potato it is, and how moreish it is (not sure if that is a good thing for the waistline :)  )

I like to make it to go with the beef casserole (or rather, serve the beef casserole on top of a bed of this Baked Mashed Potato), it seems a match made in heaven!

You will need:


  • approximately 2 fairly large, good quality, potatoes per person (I use either Maris Piper or King Edward's), however if you want to make enough to serve the next day (with left over beef casserole) then double up quantities)
  • approx 2 tablespoons of butter (or low fat spread such as Utterly Butterly)
Method:

1.  Wash the potatoes (in their skins), and prick with a sharp knife or fork all over
2.  Pop in microwave for approx 15 mins (I used 8 potatoes and gave them 15 mins)
3.  Heat oven to 180 C (Fan)
4.  When potatoes have finished in microwave, pop them onto a baking tray, and put in oven for approx 1 hour
5.  Using a sharp knife, test the potatoes to see if they are baked.  If not fully baked, give them a while longer
6.  when baked through, slice each potato in half (length or width ways, it's not important) 
7.  Scoop out the potato with a teaspoon, into a pan large enough to take all the scooped out potato from all the baked potatoes
8.  Using a fork, 'mash' the scooped out potato, and mix in the butter/spread, continue doing this over a low heat on the hob, until the potato is smooth
9.  You can add a small amount of milk (or cream if it's a special occasion!), and a little freshly ground black pepper (I don't add salt, but you can if you prefer)
10.  Pop the lid on the pan, and keep warm until ready to serve.
11.  If you have any left over, it can be used the next day to serve with left over beef casserole, or you can easily freeze it (put it into a freezer bag), and defrost before use, then reheat either in microwave or in a small pan

This makes the most incredible mashed potato, and the colour is buttery golden, with a deep intense baked taste! Perfect!  The photo does have the baked mashed potato...it's hiding under the beef casserole!

Helen's Cake

The name of the cake, and recipe to follow...but this looks so divine and just had to share with you all!!  It is made by my friend Helen, who is a Super Baker just like her Mum :)

Tuesday 26 February 2013

Extremely Tasty Rich Beef Casserole

This casserole has to be the richest, tastiest casserole, possibly ever!  The beef and vegetables emerge from the oven so sumptuous, and the juices are so rich with red wine, ginger, garlic, thyme, it is almost decadent!  We have it as a midweek meal, but it can easily be served as a special supper with a good red wine, and equally good friends!

I try not to be put off with the time it takes to prepare and cook, as it easily covers meals for 2 days for two people.  You could boost up the quantities of ingredients (particularly the beef, mushrooms and carrots) if there are more than two diners, to make your casserole cover two days too!  It is very worth the effort.  I like to serve it on a bed of Baked Mashed Potato (recipe to follow), and a green vegetable such as Pak Choi or Broccoli.  The recipe below serves four...

You will need:

  • 270g (approx) lean stewing steak, cubed  
  • 1 good sized carrot - chopped into chunks
  • 6 small shallots cut into quarters
  • 6-8 medium sized mushrooms (Chestnut or Portabello are best)
  • Tin of tomatoes
  • 1 teaspoon of freshly grated ginger
  • 1/2 teaspoon thyme (dried or fresh)
  • Splash of olive oil
  • Sprinkle of flour
  • 400 ml of stock (I use 2 beef stock cubes and 1 vegetable stock cube)
  • 100 ml of red wine
  • 1/2 teaspoon tomato puree
  • 1/2 teaspoon garlic puree (or 2 cloves crushed)
  • 1/2 teaspoon sugar
  • black pepper
  • 2 tablespoons single cream to finish
Method:

1.  Heat olive oil in ovenproof pan (shallow is better but does need a lid)
2.  Brown the steak, and add flour
3.  Add shallots, carrots, and mushrooms and cook until tender
4.  Add tinned tomatoes
5.  Make up 400 ml of stock in a jug and add the garlic puree (or crushed cloves), tomato puree, and stir into the meat and vegetables
6.  Add remaining ingredients, except the cream
7.  Bring to the boil, put lid on pan, and put in oven on 160 C (fan) for about 2 hours.  Stir after about 1 hour.
8.  Just before serving, stir in the cream
9.  Serve with Baked Mashed Potato and green vegetable

Not exactly Fine Dining, but so yummy!


Sunday 24 February 2013

Ritzy Chicken Bites

This recipe is adapted ever so slightly from a Nigella recipe!  The Ritzy part refers to the cracker biscuits which are used to coat the chicken pieces, rather than any glamorous reference to 5 star luxury hotels!  It has become a weekly teatime special for my family, and served with baked potatoes, sweetcorn, and maybe a dash of coleslaw, it is super yummy!!

The chicken pieces are dunked in a bowl of buttermilk, which has some garlic puree (or fresh crushed garlic), about 2 tablespoons of basil (dried) and some black pepper, all mixed together.  Cover the bowl with cling film, leave in fridge overnight if possible, but if not overnight, then at least a couple of hours.  The buttermilk tenderises the chicken and it just melts in the mouth.

The recipe below is sufficient for 3 hungry people, or perhaps as a buffet dish where there will be other similar offerings.

You will need:

  • 3 chicken breasts (approx 400g in weight)
  • 1  x 280 ml carton of Buttermilk
  • 1 box of Ritz Cracker biscuits (or similar)
  • approx 2 tablespoons of garlic puree (or 2 garlic cloves, crushed)
  • 2 tablespoons of dried basil
  • a good few turns of freshly ground black pepper

Method:

1.  Line 2 baking sheets with greaseproof paper, and heat oven to 180 C (Fan) assuming the chicken has been standing in its marinade for at least 2 hours, if not leave this step until you are ready to bake the chicken
2.  Pour the Buttermilk into a bowl, add the garlic puree and basil, and the black pepper, give it a good mix to ensure the garlic puree is properly integrated with the Buttermilk
3.  Cut the chicken into small pieces or strips, and dunk into the bowl making sure it all submerged.  Cover the bowl with cling film and put in fridge for at least 2 hours, but better if it is overnight
4.  Crush the Ritz cracker biscuits until resemble not so fine breadcrumbs, it doesn't matter if there are some slightly larger bits, it just adds to the rusticness!
5.  When the chicken is ready to be given its Ritzy coating, put the crushed Ritz crackers into a large freezer bag (or similar), and take a piece of chicken at a time, put it into the bag and make sure it is thoroughly coated in the Ritz crumbs, then put it onto the lined baking tray
6. Continue until all chicken has been coated in this way, and bake in oven for approx 25 mins on 180 C (Fan) depending on how small or large your chicken pieces are
7. Serve with baked potatoes, sweetcorn and coleslaw, as in the after baking photo!

Before baking
After baking!
                                                 

Luscious Lemon & Poppy Seed Loaf Cake

I have been making this cake for a few years now, and it always comes out perfectly!  It is a lovely, lemony, moist loaf cake, and it will be good as the day it was baked for around a week, kept in an airtight container.  I have added chopped pistachio nuts to the recipe, in the past, and that's a nice, interesting element to the cake. I have also put a drizzly lemony icing on top for extra sweetness and zestiness, but it is just as good without the topping, and indeed without the pistachios.

The cake is more or less effortless, foolproof, and yet worthy of taking centre stage at an afternoon tea with a refreshing cup of tea!  This cake has been made using my new low-fat alternative to butter...Utterly Butterly.  I am sure it will be equally fine made with other brands of low fat spread too.  But, tried and tested with Utterly Butterly I can personally vouch for :)

You will need:


  • 2 unwaxed lemons
  • 3 medium eggs
  • 150g Utterly Butterly (or if you want the full fat version 150g of unsalted butter) - melted
  • 170g golden caster sugar (my sugar is stored in a jar with a vanilla pod which adds a new level of flavour)
  • 170g self- raising flour
  • 50g ground almonds
  • 20g poppy seeds
Method:

1.  Heat oven to 160 C (Fan), and grease and line a 2 lb loaf tin
2.  Whisk the eggs and sugar until smooth and creamy with a hand     mixer
3.  Combine zest from 2 lemons, poppy seeds with flour and ground almonds. Fold into egg mixture using a metal spoon
4.  Fold in melted butter and finally the lemon juice from 2 lemons
5.  Spoon mixture into loaf tin and bake for 45 minutes until a skewer comes out clean

The option after it is cooled is to make a small quantity of drizzly icing with the zest and juice of 1 lemon mixed with icing sugar, and drizzled over the top to let it run down the sides of the cake in a casual fashion, and then sprinkle a teaspoon of poppy seeds on top, and maybe some chopped pistachio nuts if preferred.  But feel free to leave the top unadulterated - it will not be lacking in taste if left without a topping.

I have been writing this whilst the cake is in the oven baking away!  It has just finished baking and been brought out and the kitchen smells divine.  Need to leave the cake set a while in the tin before lifting it out though :)  Photographs next!

Enjoy!  

Friday 22 February 2013

A charming little 'piglets in mud' cake !

Photo: VEGETARISCH - VARKENTJES IN DE MODDER TAART, geplaatst door Bea Jalving, bron: Fiona de Vogel, www.facebook.com/taartvanfiona 

English translation @ bottom, recept biscuit onderaan Nederlands recept

Je hebt nodig:
- een biscuit van 20 cm (zelf bakken en sommige taartwinkels verkopen ze ook gewoon)
- 2 x grote reep melk chocola van 200 gr (mag gewoon Jumbo, AH merk zijn)
- bekertje (250 ml) slagroom
- vulling voor de taart naar keuze (bijv. een laagje jam/vlaaifruit en een laag banketbakkersroom, slagroom of botercreme.
- 3 x een five-pack KitKat
- 1 pakje (250 gr) lichtroze marsepein
- taartzaag of groot mes
- sate prikker (voor de oogjes vh varkentje)
- lint
- plat bord of plank om de taart op te zetten

Van te voren maak je alvast de varkentjes, hier is geen echte werkwijze voor...gewoon een beetje boetseren zoals op de lagere school vroeger ;)

Doe de slagroom in een pannetje en zet op laag vuur.
Blijven roeren tot het net niet kookt.
Ondertussen de reep chocola in blokjes breken.
Als de slagroom bijna kookt het vuur uit en in gedeeltes de blokjes chocola erdoor roeren.
Goed roeren tot je een gladde massa hebt.
Dit af laten koelen en dikker laten worden en af en toe roeren(duurt wel een poosje).

In de tussentijd je biscuit wat je al gebakken hebt in 2 lagen snijden, en je taart vullen met je vulling naar keuze. Een laag van de biscuit ligt op de bodem, een op de vulling.
Hou je taart voorlopig nog even op een broodplank of andere ondergrond wat je makkelijk kan ronddraaien want de zijkanten afsmeren wordt dadelijk een lekkere kliederboel :)
Breek alvast de kitkats in 2-en en leg ze klaar.
Kijk hoe het is met het chocolademengsel, als hij ongeveer zo dik is als bijv. vla kun je de zijkanten gaan insmeren ermee.
Gebruik een spatel of gewoon de achterkant van een mes.

Als je de hele taart rondom hebt ingesmeerd ga je de kitkats er tegenaan plakken.
Dit is een lastig klusje, de kitkats blijven nog niet genoeg plakken dus vallen af en toe om.
Zet ze dan een heel klein beetje schuin zodat ze tegen je taart aan leunen.
Als ze er allemaal omheen zitten doe je er snel een lint omheen en zet je ze allemaal mooi recht.

Als de rest van het choco mengsel nog net vloeibaar is giet je dit bovenop de taart.
Let op, las het nog te dun is gaat het door de kitkats heen lopen!

Vervolgens zet je de varkentjes in de nog zachte chocolade en zet in de koelkast.

Na een uurtje kun je de taart op een mooi bord zetten en serveren, eet smakelijk!


Recept basisbiscuit:
Ingrediënten
5 eieren
150 gr. suiker
125 gr. bloem
25 gr. maizena
zakje vanillesuiker
zout

Deze hoeveelheid is goed voor een ronde vorm van 24cm of een vierkante van 20x20.

Werkwijze
Beboter de bakvorm en bestuif deze met bloem of bekleed de bodem met bakpapier en vet deze ook in. Doe de eieren met de suiker en vanillesuiker in een kom. Zet de kom in een bak met heet water en klop de suiker door de eieren; klop tot de suiker volledig is opgelost en er een dikke, lichte en schuimige massa is ontstaan; klop zeker 10 minuten! Mix je met een keukenmachine, leg de eieren dan vooraf in warm water.
Schep de gezeefde bloem, de maizena en het zout er voorzichtig door; niet mixen maar spatelen! Schep het beslag in de bakvorm. Bak het gebak in ca. 45 minuten in het midden van de tot 185° C voorverwarmde oven; voor optimaal resultaat: laat de temperatuur vanaf 140° C geleidelijk oplopen naar de 185° C. De biscuit is gaar als een breinaald die je in de taart steekt er droog weer uit komt (controleer dit regelmatig na ca. 35 min. bakken). Laat de biscuit afkoelen op een rooster.

ENGLISH
You will need
A 20cm sponge cake
2x 200 g milk chocolate bars
250ml of cream
Filling of choice for your pie. Layer of jam/ tinned cherries or such, and a layer of creme patisserie , cream or butter icing
3x five packet kitkats
1 packet of light pink marzipan. ( I'm thinking you'll have to use almond paste and food colouring for this or maybe get creative with some pink marshmallows? )
Big knife
Tooth pick or skewer
Ribbon
Flat plate or board to put your cake on

Start by making your pigs. Do your own thing as there are no instructions for this.
Put your cream in a pan over low heat
Keep stirring until it just starts to boil. In between break the chocolate bars in pieces.
When the cream is almost boiling take it from the heat and gradually add chocolate. Keep stirring until you have a nice smooth mass and then leave to cool stirring every now and again.
Cut your sponge in half and put your fillings of choice in.
Put your cake , at this stage, on a lazy Susan or something else easy enough to rotate . The sides are going to be covered with your chocolate and you don't want your serving plate/board to get messy.
Break your kitkats in two and have them ready.
If your chocolate sauce has cooled at thickened to a custard consistency you can start smearing it on the sides of your cake. Use a spatula or the back if a knife to do this. Once you've smeared it all around you can stick your kitkats on. This can be a bit tricky so place them on a slight angle against the cake. When you have gone right around quickly tie your ribbon around the cake. This will pull the kitkats up straight against your cake.
When the left over chocolate sauce is only just fluid pour it over the top of the cake. MAKE SURE IT IS NOT TOO THIN WHEN YOU DO THIS OR IT WILL SEEP BETWEEN THE KITKATS.
Before it totally sets place your little piggies on the chocolate
Place in the fridge to set.
After an hour or so you can place the cake gently on your serving plate.
Eet smakelijk. Bon appetit . Enjoy
2 4 6 8 bog in don't wait:-)
Well you get the idea.
Translation by Leonie Vince Hoekstra

How cute is this cake?  Sadly, I didn't make it, but thought I would share it with you.  I particularly love the little piglets having their mud bath :)

It is made by a Dutch baking company, but they have kindly given the recipe and I've copied it for you below.  If there are any translation issues in the recipe, I can only apologise and hope you can understand it. 

You will need:

A 20cm sponge cake
2x 200 g milk chocolate bars
250ml of cream
Filling of choice for your pie. Layer of jam/ tinned cherries or such, and a layer of creme patisserie , cream or butter icing
3x five packet kitkats
1 packet of light pink marzipan. ( I'm thinking you'll have to use almond paste and food colouring for this or maybe get creative with some pink marshmallows? )
Big knife
Tooth pick or skewer
Ribbon
Flat plate or board to put your cake on

Start by making your pigs. Do your own thing as there are no instructions for this.
Put your cream in a pan over low heat
Keep stirring until it just starts to boil. In between break the chocolate bars in pieces.
When the cream is almost boiling take it from the heat and gradually add chocolate. Keep stirring until you have a nice smooth mass and then leave to cool stirring every now and again.
Cut your sponge in half and put your fillings of choice in.
Put your cake , at this stage, on a lazy Susan or something else easy enough to rotate . The sides are going to be covered with your chocolate and you don't want your serving plate/board to get messy.
Break your kitkats in two and have them ready.
If your chocolate sauce has cooled at thickened to a custard consistency you can start smearing it on the sides of your cake. Use a spatula or the back if a knife to do this. Once you've smeared it all around you can stick your kitkats on. This can be a bit tricky so place them on a slight angle against the cake. When you have gone right around quickly tie your ribbon around the cake. This will pull the kitkats up straight against your cake.
When the left over chocolate sauce is only just fluid pour it over the top of the cake. MAKE SURE IT IS NOT TOO THIN WHEN YOU DO THIS OR IT WILL SEEP BETWEEN THE KITKATS.
Before it totally sets place your little piggies on the chocolate
Place in the fridge to set.
After an hour or so you can place the cake gently on your serving plate.
Eet smakelijk. Bon appetit . Enjoy
2 4 6 8 bog in don't wait:-)
Well you get the idea.

Thursday 21 February 2013

Butter Vs Margarine in a Victoria Sponge Cake?

Following last week's Food & Drink programme on TV (Michel Roux Jnr and Mary Berry) where they taste tested 2 Victoria Sponge Cakes, one made using butter, and one made using margarine.  I decided to do the same (partly because I was being cynical and didn't quite believe that butter could be outsmarted by margarine, and partly because I needed a good excuse to make another VSC so soon after making one for Valentine's Day last week!).

Well, I can now tell you that a VSC made using Utterly Butterly (other brands are available!) is BETTER than that made using butter.  The only difference that I can detect is the gorgeous aroma of a buttery cake being baked in the oven.  With the cake using Utterly Butterly the aroma wasn't there!  But the texture and lightness were certainly there, and the taste was lovely.  The good news is that Utterly Butterly contains half the amount of fat than butter* (I used *President unsalted butter to make the cake for Valentine's Day).

I also think that the buttermilk in Utterly Butterly may help the cake with the lightness and texture, so I am now converted. I will be using Utterly Butterly in all my baking from now on.  I love the fact that the fat is greatly reduced (which doesn't necessarily mean you can have twice as much Paul!!), so now don't feel as guilty eating everything I bake!

The other point to note is that I needed to add a small amount of milk to the cake mixture last week (when using the butter to make the VSC) to achieve the dropping consistency.  I didn't need to do this with the Utterly Butterly, as the dropping consistency was perfect, and it all blended in really well and almost effortlessly.

So there we have it.  I'd be very interested to hear your thoughts on using margarine instead of butter.

Sunday 17 February 2013

White Chocolate Cookie Dough Truffles


These little gems were inspired by the Cookie Dough Truffle Pops.  If you like cookie dough (without the egg) and you love white chocolate, then you will adore these!  They can be zapped up by adding a teaspoon of your favourite liqueur to the mix, such as Bailey's, Cointreau or Kahlua. They can also be covered in milk chocolate, and can have some decoration added or a different coloured chocolate drizzled over them.

As a petit four they are perfect.  As a gift they would be greatly received, or simply make a batch for your own enjoyment!  The cookie dough recipe is the same as in the Cookie Dough Truffle Pops, and for the truffles the balls were made smaller, and this yielded approx 40 truffles.  

Melt-in-the-mouth Viennese Shortbread Biscuits

Many things in baking can be described as 'melt-in-the-mouth', and it can be an overused term.  But...when used to describe these biscuits, it is the most apt description. Seriously!


They have few ingredients, take little time in the oven to bake, and are simple to make, yet they taste divine.  Eaten within an hour of baking, they are so light in texture, and can easily accompany a syllabub or creme brulee dessert.  They are just as at home with a nice cup of tea, and should be fine in an airtight container for up to 3 days, but perhaps no longer, the fresher the better with these little beauties!  I may sound a little vague on the 'best before' information, and that is because whenever I make them they are eaten the same day!

You will need:


  • 4 oz plain flour
  • 4 oz unsalted butter (softened)
  • 1 oz icing sugar
  • a few drops of vanilla extract (not essence)
Method:

1.  Cream the butter and sugar together until light and fluffy.  I use a hand mixer for this part, and if the butter is sufficiently soft (not melted) it will combine easily
2.  Add vanilla extract and gradually mix in the flour
3.  Put dough into a piping bag fitted with a large star nozzle (the bigger the better so the ridges will hold when baked
4.  Pipe lines of about 2 inches in length onto a baking sheet (lightly greased with butter)
5.  Bake on 180 C (Fan) for 12-15 mins, but check after 12 mins to make sure they are not too dark (the lighter golden the better they will be) 
6.  Leave to cool on baking sheet before removing, and store in an airtight container

For a special occasion you can dip half of each biscuit into melted chocolate!

Shortcrust Pastry

As mentioned in the recipe for the Leek and Ham Hock Tart, this pastry was effortless, it was my first attempt at pastry (I have always resorted to cheating with ready made), and it tasted light, tasty, and had just enough crisp to it for the tart to hold firm.

You will need:


  • 200g plain flour
  • 110g butter (unsalted)
  • 3 tablespoons approx of very cold water
  • pinch of salt 
Method:

1. If using a food processor (I did and it was effortless) put all ingredients (except the water) into the processor, and using pulse, make sure the flour, salt, and butter are properly mixed together, and resembles breadcrumbs
2.  Add the water, and using the pulse setting again, mix until it comes together to make a firm dough
3.  Turn out onto a floured surface and knead for a short time (handle the dough as little as possible) to make a firm round ball, and wrap in cling film, and chill for about 30 mins
4.  This quantity is perfect for an 11 inch flan tin (I used a loose bottomed tin which was greased) roll out the pastry to the required size, and carefully put it into the prepared flan tin
5.  Gently ease it into the fluted parts of the tin using a ball of pastry, and then using a fork prongs, stab the pastry bottom in several places 
6.  Scrunch up a piece of greaseproof paper large enough to cover the inside of the flan tin , and cover the paper with ceramic beans, and bake blind for 15 mins on 180 C (Fan)
7.  After 15 mins remove greaseproof paper and ceramic beans and return the flan case to the oven for a further 10  mins.  The pastry should be very lightly golden, and looking dry on the bottom
8.  It is now ready for the filling of your choice (savoury!)

Fancy something savoury?

...Leek & Ham Hock Tart

This tart is so versatile; just about anything can be used in place of the leeks and the ham hock.  Once again you will be limited by your own imagination!  It makes an excellent savoury piece for an afternoon tea, a summer salad, a picnic, or how about a mid February Sunday afternoon treat?  Perfect served with new potatoes and salad, or even on its own!  So many options!  

I have made this tart using just leeks, and have made it using prosciutto.  This particular tart has been made with ham hock (I cheated and bought the ready prepared ham hock from Waitrose, so no faffing about soaking and boiling the ham - got to find an easy life somewhere!).  I must say the addition of ham hock makes it a more substantial slice of tart than if I used just the leeks without any meat, so you choose which you prefer, the lightness of a leek tart, or if you are in need of something more wholesome then add the ham hock.

In the past I have made this using ready made pastry (another labour saving device!) and really have shyed away from making pastry from scratch!  I decided to grab the bull by the horns today, and make pastry...another secret I will share with you...my very first pastry too!  There it's out in the open :)  However I must say that making the pastry was no where near as daunting as I presumed it would be, in fact it was effortless (I did use a food processor to make it in), and it tastes 100% better than the ready made stuff!  So no more cheating from me!

You will need:


  • 1 shortcrust pastry tart shell 11 inches (recipe to follow)
  • 2 tablespoons of butter
  • 2 leeks finely sliced (and rinsed very well) the weight of the leeks should be approx 550g
  • 2 tablespoons of Dijon mustard
  • approx 100g of ham hock (or if using prosciutto about 3 slices cut up small
  • 2 teaspoons of grated Gruyere cheese (or Cheddar if preferred)
  • 2 medium eggs (beaten) in a jug
  • 1/2 cup of double cream
  • make up the volume in the jug of eggs and double cream, using single cream to reach 350 mls
  • a pinch of salt and about 1/4 teaspoon black pepper
Method:

1.  Melt butter in large pan and cook leeks, stirring occasionally until softened.
2.  Brush pastry shell base with Dijon mustard so that all surface is covered
3.  Spread leeks over the Dijon mustard to cover the bottom of the tart shell
4.  Sprinkle the top of the leeks with the ham hock (or Prosciutto)
5.  Whist together the eggs, cream, salt and pepper, and pour over the leeks and ham hock, then sprinkle the grated cheese over the top
6.  Bake for 30-35 mins or until golden, on 180 C (Fan) - please reliable conversion for other ovens

Enjoy!

Friday 15 February 2013

Coming up soon...


  • Melt-in-the-mouth Viennese Shortbread biscuits
  • White chocolate cookie dough truffles
Come back soon to see them, and get the recipes! 

Thursday 14 February 2013

A Slightly Adapted Mary Berry Recipe for...

  ...Victoria Sponge Cake!  (a Valentine's Day edition!)                                             


In celebration of Valentine's Day, I wanted to make a cake that had a little bit of Wow! without a massive amount of effort.  Mary berry's Victoria sponge Cake recipe has been given a revival lately, and I keep seeing it everywhere, so took this to be a sign that I should make one!  I made only a few adaptations to it, as I like to dabble a bit!

The original Mary Berry recipe is clearly a classic, and is quite simple in execution and assembly.  I personally don't go in for a full covering of icing sugar, or even the tooth achingly sweet covering of a scattering of caster sugar on the top of the cake; but that's just my subjective taste coming to the fore!

I do like subtlety, and I also think the classic version lacks something from the middle of the cake (I know, how dare I criticise this Great British cake staple?).  So, strawberry conserve to the rescue along with a small quantity of double cream the healthy variety!) mixed up with a tablespoon of icing sugar to sweeten the cream a little.  The result was delicious, and certainly benefited from the cream and conserve mix.

The recipe...

You will need:

  • 225g unsalted butter (softened)
  • 225g self-raising flour
  • 225g caster sugar (white)
  • 4 eggs beaten in a jug (weighing approx 225g when out of shells)
  • 1 teaspoon vanilla extract (not essence)
  • 2 teaspoons baking powder
Method:

1.  Heat oven to 180 C (Fan) please use reliable conversion for other ovens
2.  Grease and line (with a disc of greaseproof paper) 2 x 20cm round tins
3.  Put all ingredients, except the eggs, into a large mixing bowl, add the eggs a little at a time, and mix together until a smooth dropping consistency.  If a little stiff, and not dropping from spoon, add a small amount of milk to help it along
4.  Pour mixture into the tins, evenly distributed
5.  Put on middle shelf in oven for approx 25 mins (don't be tempted to open oven door until at least 20 mins has passed)
6.  Remove from oven when golden, and springy to the touch, leave to cool slightly before removing from tins and putting onto wire rack to cool completely.
7.  Turn one of the cakes upside down, spread this with the strawberry conserve, then top this with the cream.  Add the top cake.  Decorate as you wish.

                           Enjoy!

Wednesday 13 February 2013

Suze Recipe...Scones!


A teatime favourite!
My friend Suze is an incredible baker...well that doesn't quite do her justice, she is quite an incredible person!  Anyway before I cause her much embarrassment let me tell you about her baking prowess.  Everything I have ever tasted that Suze makes is just mouth wateringly delicious.  Suze made me the most incredible chocolate cake for my birthday recently, it rendered me speechless, such was the scrumptiousness of it.  I am hoping to have the recipe for the chocolate cake (I am sure it must have a grander name than simply chocolate cake!) and I will share it with you as soon as I can. :) 

Just last week, Suze made yet another tantalising treat, beautiful, light and airy scones.  I cheekily asked her for the recipe so that I could try to recreate them here for you, together with photos!  I hope I've done the recipe justice! :)


You will need:


  •   225g self-raising flour
  •   80g butter (unsalted)
  •   1 tablespoon caster sugar (I used golden in mine)
  •   1/2 teaspoon baking powder
  •   handful of currants
  •   1 egg beaten with 5 teaspoons of milk (reserve a bit to    brush scone tops)
  • 1/2 teaspoon salt (although I did not put any in my scones...cutting down!)
Method:

1. Sieve together the flour and baking powder (and salt if using) into a large mixing bowl
2. Rub the butter into the flour (it helps to cut the butter up into small pieces) until it resembles fine breadcrumbs
3. Stir in the sugar until evenly distributed
4. Add the currants
5. Add about half of the egg/milk mixture to get the dough to bind together (I used a spoon but you can use your hands)
6. Add a little more liquid if not holding together, don't pour in all the liquid or it will be too sticky
7. Turn the dough out onto a floured surface, and roll to a depth of approx 1 inch, using a cutter, cut our your scones. The quantity will depend on the size of your cutter, I used a 2 1/2 inch cutter and got 11 scones from the mix
8. Put onto a greased/floured baking sheet, brush tops with the egg/milk liquid (careful not to let it drip down the sides of the scones as this can prevent from rising evenly)
9. Put in oven for 10-12 mins Fan 180 C (please use a reliable conversion for Gas or other)
10. Allow to cool slightly on a wire rack before eating, then cut open spread with butter, jam (and maybe cream if you're feeling particularly decadent) and enjoy!

As with most scones and cakes, these are best eaten as fresh as possible!  Thank you Suze :) x

Just in case you need another pancake recipe...


...I've thrown my old recipes for pancakes out!  This recipe is easily the best I've ever tasted...


Ingredients

  • 110g plain flour
  • 2 medium eggs
  • 75ml water
  • 200ml milk (semi)
  • 2 tablespoons of melted butter
Method
1. Put flour into a large mixing bowl. Make a well in the centre, break the eggs into it and whisk together.
2. Combine the milk and water in a jug then gradually add to the batter while whisking continuously. Once all the liquid has been added, continue to whisk until the batter is smooth and creamy.
3. Melt the butter and whisk 2 tbsp into the batter. 
4. Brush a 20cm frying pan with sunflower oil or vegetable oil, and heat until it is really hot, reduce the heat to medium and ladle about 3 tbsp of batter into the pan then immediately swirl around so the base is evenly covered.
5. Cook for about 30 seconds or until the underside begins to turn golden, flip the pancake and briefly cook the other side.
This recipe is totally gorgeous, producing very light, and lacey thin crepes!


Nothing to do with cakes or baking, but...

...as Valentine's Day approaches, most peoples thoughts will have turned to the subject of flowers ;)  I often struggle to keep my flowers looking fresh as a daisy after a few days, and 
M&S deadhave searched for tips to help keep them looking good for longer.

Try these tips to ensure your beautiful flowers look as good as the day they were bought:


1. Before placing flowers in water, remove excess leaves from the stems. This allows more water to get directly to the flower head. 
2. Always cut the flower stem at an angle. A bigger surface area means more water can be absorbed. 
3. Bacteria build-up in water encourages flowers to wilt. Ideally change water every day to prevent this. 
4. Add a 1p coin to the vase. The copper acts as a natural fungicide, killing mould and yeast and keeping the water cleaner for longer.
5. Try adding a pinch of salt or an aspirin to the water. Salt encourages plant cells to ‘drink’ more water and contains the ­nutrient potassium, while the salicylic acid in the aspirin will help to stop the growth of bacteria.
6. Pour in a splash of fizzy lemonade. The sugar in the drink provides nourishment to the bloom and slightly raises the acidity of the water, making it closer in pH to cell sap which, in turn, allows water to travel up the stem much more quickly. 
7. Another way to kill bacteria in plant water is by adding vodka or bleach. Make sure you add only a few drops of either otherwise your plant will die.
8. Keeping flowers cool is crucial. Direct sunlight and radiators are a definite no-no, drying them out faster.
9. Placing blooms close to fruit is also a bad idea. Fruit produces ethylene as it ripens, which causes flowers to mature quicker. Let the flowers have their own space. 
10. If an individual flower begins to wilt, remove it from the arrangement or it will spread bacteria and use up nutrients the other stems might need.


Tuesday 12 February 2013

Facebook...

While I am trying to figure out how to put a Facebook button on the Blog, please click HERE to follow my page if you want to keep in touch!  

Delicious toffee sauce to go with pancakes, ice-cream, sticky toffee pudding, meringues & berries.....

Home-made Delicious Toffee Sauce

How can something so simple be so delicious?  This sauce is so versatile and can add naughty delectability to just about any dessert dish.  You can even use to add a bit of something special to an everyday apple crumble, just spoon the sauce over the apple, then top with the crumble....Yum!  I adore it on pancakes too, so will be making some today!

You will need:


  • 55g butter (unsalted is best, but salted will give you the In Vogue Salted Caramel taste)
  • 80ml double cream (you can try to go a bit healthier with this and use the lower fat varieties!)
  • 110g dark brown soft sugar (the darer the sugar the darker the sauce, so if you prefer a lighter colour then use light brown sugar)


Method:

1.  Put butter, cream and sugar into a pan over a medium heat
2.  Stir constantly until mixture bubbles and sugar is dissolved
3.  Drizzle over the dessert of your choice whilst still hot; or allow to cool slightly and pour into a jar with a  good seal/lid, store in fridge until you need it.

When I make a batch of this sauce, I usually have it in the fridge for about 1 month, just taking out small amounts as and when required and heating in microwave in a small jug or/ramekin for about 15-20 seconds.  I should also add that I always double up on the ingredients to make a larger quantity, which is maybe why it lasts me a month!  It is superb with the pancake recipe :)


Monday 11 February 2013

Simple to make...Cookie Dough Truffle Pops holder

Materials

You will need :

  • an oblong cardboard box (imagine a breadsticks box, similar dimensions to one of those boxes, or even a shoe box)
  • Scissors
  • some scrunched up (clean) paper to put inside your box if it is not sturdy, this will strengthen the box as the pops can be quite heavy especially if you have 24-30 of them!
  • 1 lolly stick to act as a template


Instructions:

  • stuff the scrunched up paper into the box to make it sturdier, and seal the end of the box that was once open
  • using the scissors, make slots large enough for a lolly stick to be slotted into; ensuring that they are spaced far enough apart to allow for a cookie dough pop with chocolate covering to stand upright, without touching its neighbouring pop
That's all there is to it!  You can reuse the holder providing it isn't marked with this batch of cookie dough truffle pops!  If it will not wipe clean, you will need to discard and make another the next time you make more pops!


Cookie Dough Truffle Pops


Cookie Dough Truffle Pops...

Now I'll be honest with you, the idea of these instantly appealed to my sense of 'Cook's Perks'...you know that moment when you have the bowl you've mixed up your cake batter or biscuit/cookie dough in?  You are faced with the choice (difficult sometimes!) of either using your bowl scraper to remove every last remnant of batter/dough to boost up your baking quantities; or getting the remnants out and just eating them, raw so to speak!

For those of you who worry about the raw egg in the unbaked batter/dough, you can have total peace of mind with these delectable treats...no eggs were used in the making of them!  These cookie dough pops are HUGE in the USA, and they even have a National Cake Pop Day (1st February)  - whilst these are not cakes, they are a variation on the theme of, and cookie dough is almost a national delicacy in America anyway!

They are very easy to make, but a little time consuming to 'construct' into pops.  They can quite easily be made into a truffle (minus the lolly stick, as simply as that!), For those with nut allergies, or worried that your guests may have allergies, then omit the peanut butter from the recipe, it will make little difference to the consistency as so little is used, you could maybe add a little more butter if the mixture needs a bit more binding together at the creaming together of butter and sugar stage.  So here's the recipe, do let me know how you get on, and what variations you come up with!

Depending on the occasion you can decide on dark chocolate (for a more sophisticated petit four after a nice meal); or milk or white chocolate with colourful decoration in the shape of 100's and 1000's, or anything that takes your fancy, for parties and younger cake pop fans!

There are several recipes online currently, and mostly they share the same ingredients, some add bicarbonate of soda to the mix (not sure why, as they are not baked so no need for a rising agent), some add different coverings and decorations, some add flavourings.  I would say that you are limited by your own imagination with these, but do start off with the basic dough and work from there before adding your own touches to the pops.


Makes 24-30 depending on the size of your pops

110g unsalted butter  at room temperature and softened (not melted)
175g soft light brown sugar
1/2 teaspoon vanilla extract
1 tablespoon smooth peanut butter (optional)
200g  plain flour
125g chocolate chips (or finely chopped chocolate)
50ml milk
200g melted chocolate (use either dark, milk or white)
12-15 lolly sticks cut in half to make 24-30 shorter lolly sticks (you can even write a little message on each lolly stick depending on the occasion!)


1.  Put sugar and butter into bowl, beat until light and fluffy
2.  Beat in vanilla extract, peanut butter if using, and when well beaten, stir in flour and milk. Stir until the dough is smooth.
3.  Stir in chocolate chips until well distributed in dough
4.  If the dough is very sticky (you will need to gather up a small amount and try to roll in your hands), add more flour, mix in until well combined.  The mixture needs to be firm, not sticky.
5.  When you are happy with the consistency of the dough, spoon small amounts of the dough onto a prepared tray (lined with greaseproof paper), try to get each amount roughly the same size, you could use some sort of measure for this to get uniform amounts.  I used a 1 tablespoon measure and made the amount slightly heaped.  At this stage it does not matter that you have very roughly shaped mounds.  Once all cookie dough is on the tray in small mounds, put in freezer to chill for about 30 minutes.  Any longer and they will begin to freeze and rolling into balls will quite painful on your hands!
6.  While the dough is chilling, break the chocolate into pieces into a glass bowl over a pan of boiling water, and melt the chocolate.  Remove from pan of water once melted, and leave to cool slightly.
7.  As soon as 30 minutes has elapsed, remove the chilled cookie dough mounds from freezer, and roll each mound into a ball between the palms of your hands.  Dip the cut end of the lolly stick into the melted chocolate and insert into the cookie dough ball (this should secure the stick into the cookie dough ball).  At this stage, you can just sit the cookie dough ball plus stick back onto the tray, awaiting its final chocolate coating
8.  Using a teaspoon, spoon the melted chocolate over the cookie dough ball, holding it by the stick, turn it round so that it runs all over the ball, and excess drips back into the bowl.  Then either lightly dip into a saucer of 100's and 1000's or other decoration, or sprinkle them on to the still liquid chocolate.  In a couple of minutes the chocolate will set (this will largely depend on the heat of the kitchen, the heat of the chocolate, and the coldness of the cookie dough ball).  As soon as the chocolate looks dry, put the lolly stick into holder (see instructions to make a simple one, as the acrylic holders which are purpose made are very expensive!), and leave to set completely (about half an hour or so).

These should keep nice and fresh in the fridge for 1 week, in an airtight container.  You can also put 3-4 of them into a nice cellophane bag tied with ribbon/raffia for a gift to someone special!